음악, 삶, 개발
Juce 와 Gradient 본문
< 소개 >
Adobe 의 Illustrator 를 보면 아래와 같은 Gradient 패널을 볼수있다.
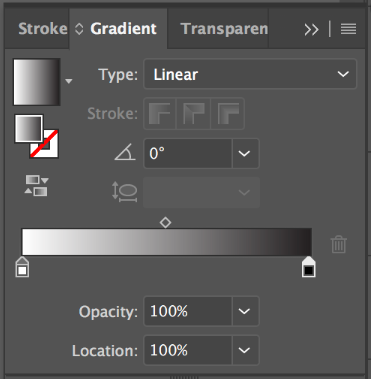
Gradient 는 Linear 와 Radial 라는 2개의 종류로 나뉜다.
Linear : 시작점에서 끝점으로.
Radial : 중심에서 바깥으로,
우리가 일러스트레이터에서 에서 Gradient 를 만들듯이,
Juce 에서 이를 코드로써 표현하면 된다.
하지만, 이런 Gradient 디자인을 코드로 하기전에,
일러스트레이터로 먼저 작업해봄으로써 디자인을 확정하는것이 많은 프로그래머들이 추천하는 방식이다.
코드는 계속해서 컴파일을 해야 결과를 볼수있기때문에,
컴파일을 해가며 디자인을 해나가는것은 굉장히 시간 낭비이기때문이다.
결국 훌륭한 GUI 디자인을 위해서, 더나아가 VST 개발을 위해 Illustrator 를 잘다루는것은 필수인거같다.
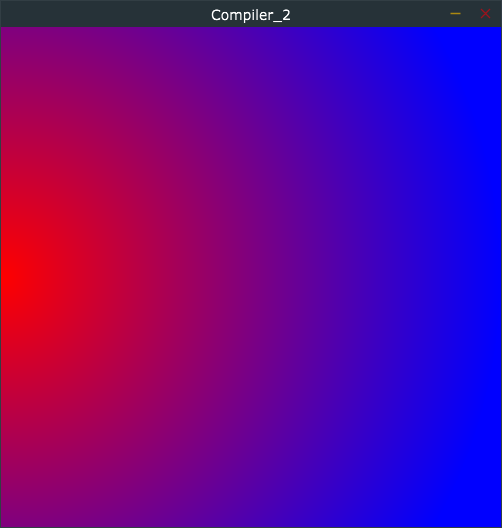
< Linear Gradient : Red, Blue>
void paint(juce::Graphics& g) override {

    const auto area                     = getLocalBounds();
    const juce::Colour startColor       = juce::Colours::red;
    const juce::Colour endColor         = juce::Colours::blue;
    const juce::Point<float> startPoint = { 0.0f, (float)area.getHeight() / 2.0f };
    const juce::Point<float> endPoint   = {(float)area.getWidth(), (float)area.getHeight() / 2.0f };
    const bool isRadial                 = false; // false means Linear gradient.

    juce::ColourGradient gradient { startColor, startPoint, endColor, endPoint, isRadial };
    g.setGradientFill(gradient);
    g.fillAll();

}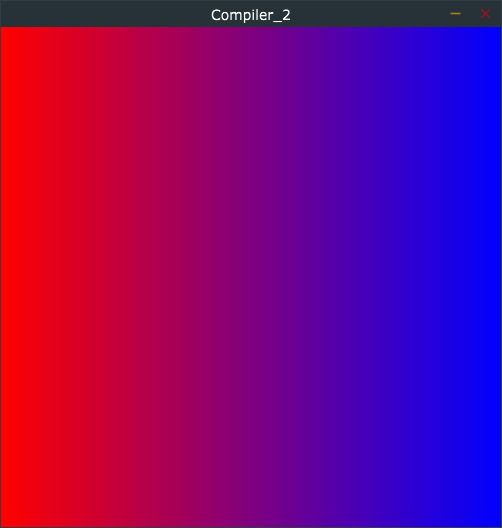
일반적인 Linear Gradient 가 작동하듯, startPoint 는 왼쪽 가운데 지점,
end point 는 오른쪽 가운데 지점이다.
gradient 객체의 5번째 인자에 false 를 전달하면 linear 가 되고, true 를 전달하면 radial 이 된다는것을 기억하자.
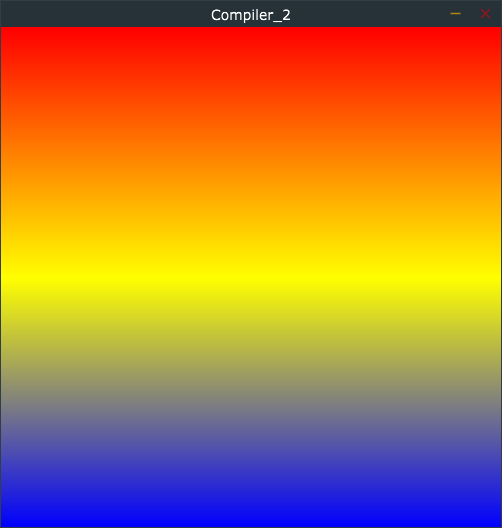
< Linear Gradient : Red, Yellow, Blue>
void paint(juce::Graphics& g) override {

    const auto area                     = getLocalBounds();
    const juce::Colour startColor       = juce::Colours::red;
    const juce::Colour endColor         = juce::Colours::blue;
    const juce::Point<float> startPoint = { 0.0f, (float)area.getHeight() / 2.0f };
    const juce::Point<float> endPoint   = {(float)area.getWidth(), (float)area.getHeight() / 2.0f };
    const bool isRadial                 = false; // false means Linear gradient.

    juce::ColourGradient gradient { startColor, startPoint, endColor, endPoint, isRadial };

    // add more colors here!
    gradient.addColour(0.5, juce::Colours::yellow);

    g.setGradientFill(gradient);
    g.fillAll();

}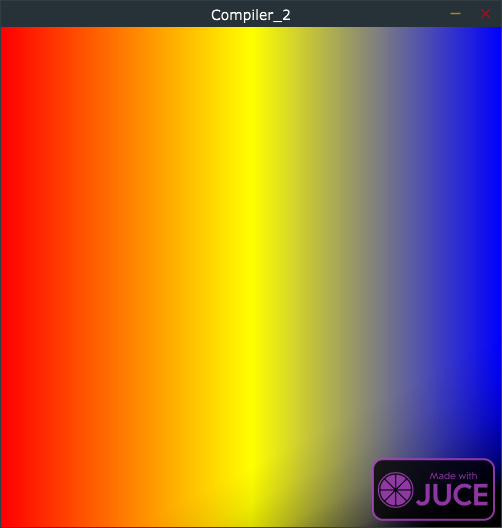
이 전 코드에 아래 코드가 추가되었다.
gradient.addColour(0.5, juce::Colours::yellow);중간지점에 노란색을 추가하라는 소리이다.
이 0.5 는 x 나 y 좌표가 아닌 gradient 객체의 중간 지점을 의미한다.
따라서 만약 vertical gradient 라 하더라도 정확히 중간을 가리키게 된다.
아래 그림 처럼 말이다.
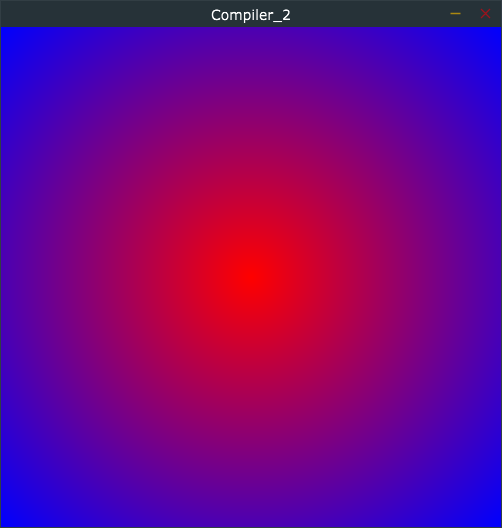
< Radial Gradient : Red, Blue (Mistake!)>
void paint(juce::Graphics& g) override {

    const auto area                     = getLocalBounds();
    const juce::Colour startColor       = juce::Colours::red;
    const juce::Colour endColor         = juce::Colours::blue;
    const juce::Point<float> startPoint = { 0.0f, (float)area.getHeight() / 2.0f };
    const juce::Point<float> endPoint   = {(float)area.getWidth(), (float)area.getHeight() / 2.0f };
    const bool isRadial                 = true; // false means Linear gradient.

    juce::ColourGradient gradient { startColor, startPoint, endColor, endPoint, isRadial };
    g.setGradientFill(gradient);
    g.fillAll();

}
isRadial 를 true 로 함으로써 Radial gradient 를 표현하려했지만,
startPoint 와 endPoint 가 잘못되었다.
우리가 생각하는 일반적인 Radial gradient 가 되기위해서는,
start point 는 중간을. end point 는 가장 바깥지점을 지정해야한다.
아래의 코드처럼 말이다.
< Radial Gradient : Red, Blue>
void paint(juce::Graphics& g) override {

    const auto area                     = getLocalBounds();
    const juce::Colour startColor       = juce::Colours::red;
    const juce::Colour endColor         = juce::Colours::blue;
    const juce::Point<float> startPoint = {(float)area.getWidth() / 2.0f, (float)area.getHeight() / 2.0f };
    const juce::Point<float> endPoint   = {0.0f, 0.0f };
    const bool isRadial                 = true; // false means Linear gradient.

    juce::ColourGradient gradient { startColor, startPoint, endColor, endPoint, isRadial };

    g.setGradientFill(gradient);
    g.fillAll();

}
정상적으로 우리가 생각한 Radial Gradient 가 되었음을 확인할수있다.
endPoint 는 사각형의 4면의 꼭지점이라면 똑같은 결과가 나온다.
< Radial Gradient : Red, Yellow, Blue>
void paint(juce::Graphics& g) override {

    const auto area                     = getLocalBounds();
    const juce::Colour startColor       = juce::Colours::red;
    const juce::Colour endColor         = juce::Colours::blue;
    const juce::Point<float> startPoint = {(float)area.getWidth() / 2.0f, (float)area.getHeight() / 2.0f };
    const juce::Point<float> endPoint   = {0.0f, 0.0f };
    const bool isRadial                 = true; // false means Linear gradient.

    juce::ColourGradient gradient { startColor, startPoint, endColor, endPoint, isRadial };

    // add more colors here!
    gradient.addColour(0.5, juce::Colours::yellow);

    g.setGradientFill(gradient);
    g.fillAll();

}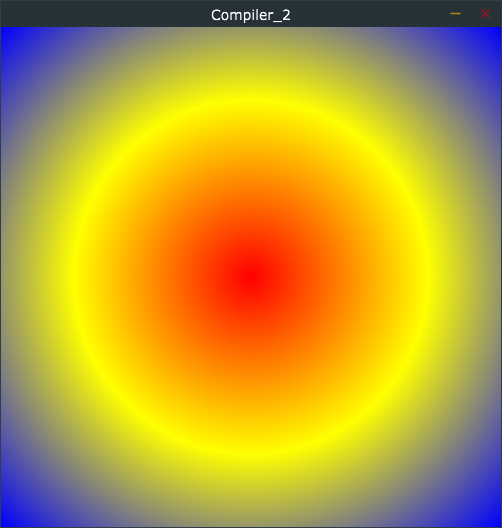
아래의 코드를 추가함으로써 노란색이 중간에 추가되었다.
gradient.addColour(0.5, juce::Colours::yellow);Linear Gradient 를 원한다면,
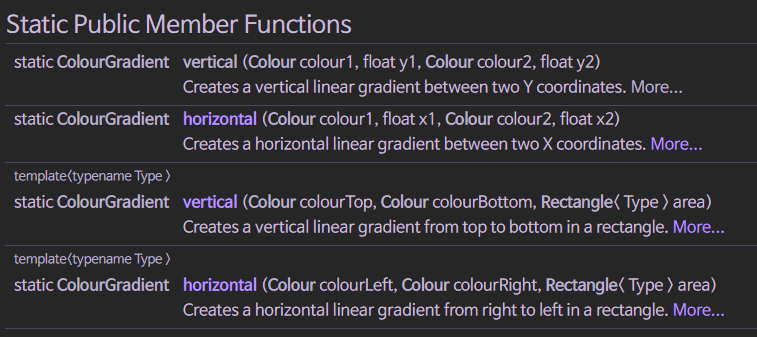
Gradient constrcutor 를 사용하는것보다,
아래 Static 함수를 사용하도록 하자.